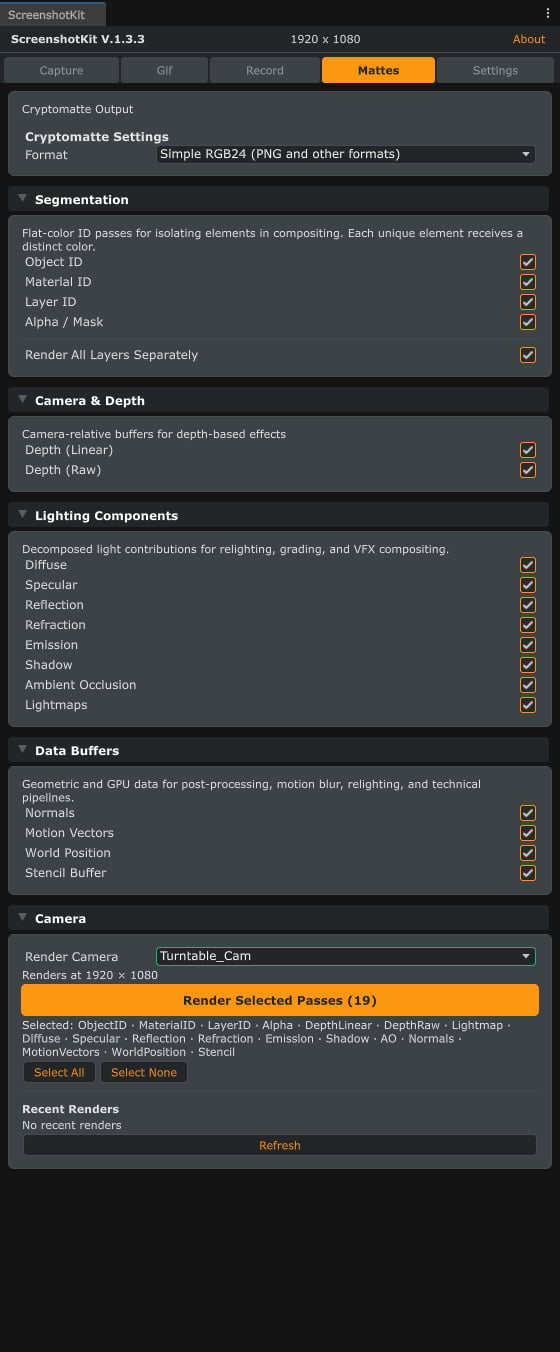
The Mattes tab: Cryptomatte output format, then the Segmentation, Camera & Depth, Lighting Components, and Data Buffers pass groups, and the render button.
Steps
1
Open the Mattes tab
In the ScreenshotKit window, click the Mattes tab.
2
Pick a Cryptomatte Output mode
3
Pick a Segmentation Mode (Multi-layer EXR mode)
- By GameObject: every unique GameObject gets its own ID.
- By Material: every unique material is one ID.
- By Layer ID: IDs come from Unity’s layer bitmask.
4
Enable passes
Enable the passes you want from the four groups:
- Segmentation: Object ID, Material ID, Layer ID, Alpha
- Camera & Depth: Depth (Linear), Depth (Raw), Lightmap
- Lighting Components: Diffuse, Specular, Reflection, Refraction, Emission, Shadow, Ambient Occlusion
- Data Buffers: Normals, Motion Vectors, World Position, Stencil
5
Render
Either click Render Selected Passes to render only the matte passes, or go back to the Capture tab, enable Render Mattes under Settings, and take a normal screenshot. Every enabled pass is rendered alongside the beauty pass.
Result
One file per enabled pass, named with the pass suffix (for exampleMyCam_ObjectID.exr, MyCam_Normals.png). Multi-layer EXR mode forces .exr for ID passes regardless of the global image format setting.
Depth (Linear) is normalised 0 to 1 across the camera’s near and far planes. Depth (Raw) is the unprocessed Z-buffer.
See also
- AOV Pass List for what each of the 18 passes captures.
- Runtime API: capture with mattes for the scripted equivalent.