Requirements
The window at a glance
Open the window from Tools > ScreenshotKit > Settings Window, or click the ScreenshotKit toolbar overlay in the Scene View. It has five tabs: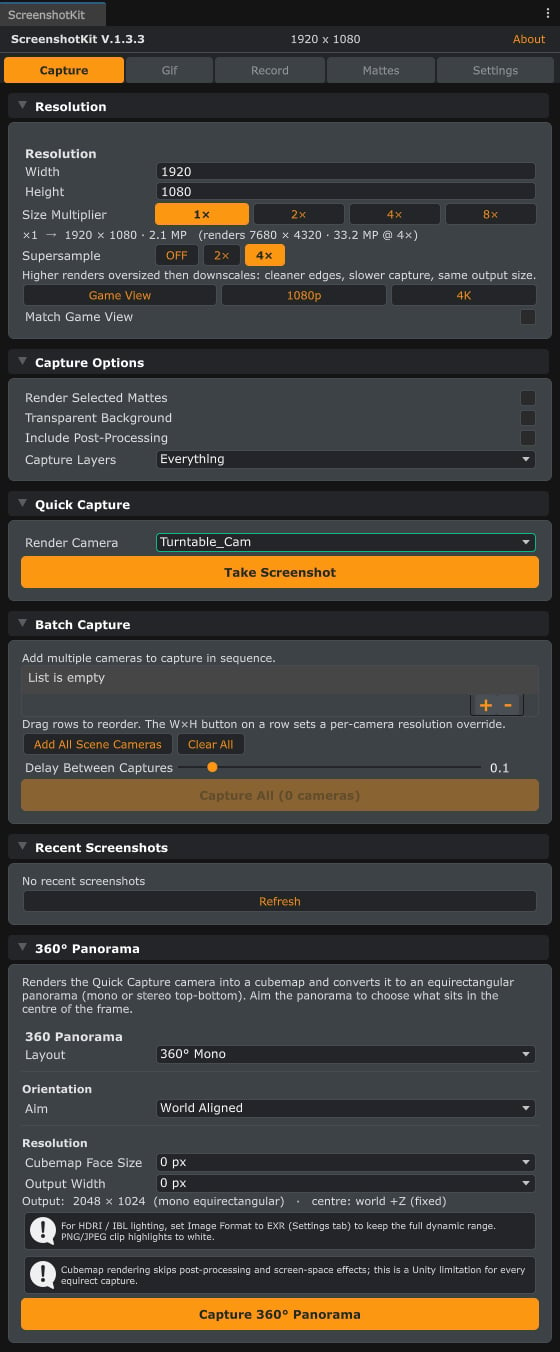
The Capture tab: resolution, capture options, quick capture, batch capture, and 360 degree panoramas in one place.
What you can capture
Single Screenshot
High-resolution stills up to a 132.7 megapixel budget, with 1x to 8x supersampling.
Batch Capture
One shot from every camera in the scene, with consistent naming and optional mattes.
Transparent PNG
Alpha from Cryptomatte, post-processing, or a hybrid of both.
360 Panorama
Mono or stereo top-bottom equirectangular panoramas, aimable from the capture camera.
GIF Recording
Threaded GIF encoding straight from Play Mode.
Image Sequence
Frame-by-frame stills in PNG, JPEG, TGA, or EXR, with optional per-frame mattes.
Video Recording
MP4 (H.264) and WebM (VP8) recording: live camera, viewport, or deterministic turntable.
Cryptomatte & AOV
Spec-compliant Cryptomatte EXRs plus 18 AOV passes for Nuke, Fusion, AE, and Resolve.
Runtime API
Everything the window does for stills, GIFs, and sequences is also scriptable at runtime through theDaCruz.ScreenshotKit namespace, for in-game photo modes, automated capture passes, or build-time tooling. Start with the Runtime API overview.